Windows 10 add app to pinned tiles. Renaming tile groups
Windows 10 gives the user the ability to flexibly customize the tiles on the Start menu. You can personalize them to your taste, or turn them off altogether if they do not suit you. In this article, you will find all the ways you can turn off Live Tiles in Windows 10.
How to Remove Tiles from the Start Menu in Windows 10
First, consider the case when you want to get rid of the tiles in the Start menu altogether. It's pretty easy to do this:
In the end, you will only have a list of all installed applications.
How to disable individual Live Tiles in Windows 10 Start Menu
It is not necessary to unpin all tiles. If the performance of a particular tile is not to your liking, you can disable it individually.

Disabling All Live Tiles Using the Local Group Policy Editor
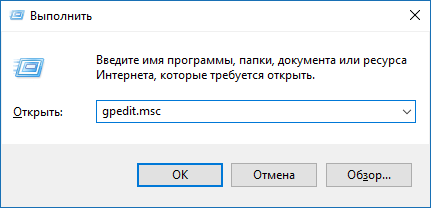
If you want to disable absolutely all live tiles in the Start menu, you can do this using the Local Group Policy Editor. Please note that it is not available in Windows 10 Home edition, so users of this version of the operating system will have to use the method described a little below.
Note: The specified method of disabling Live Tiles only works for a specific user, and not for all computer accounts.
If you want to return everything back, just change the value of the parameter to Not set.
How to Disable All Live Tiles Using Registry Editor
Windows 10 Home users will need to add a few values to the registry to complete this procedure.

Now we need to clear the existing live tile cache. You can do this in the following way:

Now it is enough to restart the computer to see the changes made in action. If you want everything back, just remove the keys NoTileApplicationNotification and ClearTilesOnExit. To do this, just click on the parameter with the right mouse button and select the item Delete.
Hello everyone, today I will tell you how to add tiles to the windows 10 start, and how to add more of them than there are already, since such a question has already come to me for the second time. It was in Windows 8.1 that the start-up with its tiles, in my opinion, was more convenient, put what you need on the start screen and enjoy life, and you didn’t need to expand anything, but oh well.
Why is it needed at all, well, in my opinion, for greater convenience, in order to place more of the most frequently used programs. And so you have Windows 10 installed and you don’t have the problem that the start menu does not work in windows 10, but you need to add tiles to the start. To complete the task, there is nothing complicated. Open start and select Settings. Pay attention to the current area size for Windows 10 tiles, quite small.

The next step is to select the Personalization menu. In personalization, all the settings of the start button are collected.

In the Colors section, you can choose the coloring of the tiles, in the start menu, it is convenient that the choice is very large.

And so in the Start item, you can increase the number of tiles, pay attention to the picture with the arrow, the current area is shown there and the Show more tiles checkbox is turned off from the bottom, and you need to turn it on.

As a result of these actions, you have an additional section in the picture, for tiles in the Windows 10 start.

As a result, you get this view, it began to fit 4 tiles already.

If there is a desire to add more folders there, then this is done in the item> Select which folders will be displayed in the Start menu.

And here is the choice itself, from the useful, you can add downloads and documents.

How to make a start like in Windows 8
If you suddenly, like me, like the style of the metro and you don’t get annoyed when you press start, the appearance of a screen with a bunch of tiles on the start screen, then in Windows 10, you can also return it, especially convenient if you have it on a tablet. This is done simply, with a switch, all in the same personalization, namely Open the home screen in full screen mode.

And lo and behold, you have normal tiles, although, I repeat, this is a matter of taste for each user.

Also in dozens, they made an improvement that on the initial screen, it is possible to see the classic start.

Now you know how to add tiles to windows 10 start, but now the question is how to disable tiles + in windows 10 start, everything is correct, in the same way, turn off additional tiles, and remove all tiles from start with right click. Although I advise you to use the tiles of the home screen, believe me, it's really convenient.
The Windows Central site found a fairly simple way to get rid of all live tiles in Windows 10 and shrink the start menu so that it only has one column. How to do this, read below.
First, unpin all live tiles from the start menu - right-click on each of them (or hold your finger until the menu appears) and select "Unpin from start screen". After there is no tile left in the menu, drag the right edge of the menu to the left with the mouse or using the touchpad.
The menu will become narrow, there will be no place for live tiles on it, which is what we wanted. In tablet mode, there will also be no tiles, just a blank screen.
To return the tiles to the start menu, in the list of installed applications, right-click (or your finger in the case of a touch screen) on any application and select "Pin to Start" in the mini-menu that appears. The start menu will instantly be expanded, and a live tile will appear on it.
Friends, why do you think Microsoft has not provided an easier way to remove all live tiles from the start menu in desktop mode?
w7phone.ru
Remove Live Tiles from the Start Menu in Windows 10
Live Tiles in the Windows 10 Start Menu is convenient and beautiful. But the habit is an individual matter, many users have begun to hate live tiles since the age of eight. There is no special option or setting that could change the start to the menu familiar to many users - one column with the necessary set of programs and links.
Therefore, we will resort to a little trick that will help us put the start menu in order.
Removing Live Tiles from the Start Menu
First of all, we remove all the tiles from the menu one by one. Right-click on all the tiles in turn and select "Unpin from Start Screen".

Be careful, if you select "Delete", then the application itself will be deleted along with the tile.
In my case, I had to reboot the system for the tiles to disappear.

In order not to reboot the entire system, you can restart the "Explorer". Start the "Task Manager" by pressing the "Ctrl + Alt + Del" keys, find the "Explorer" process in the list of processes, right-click on it and select "Restart".

So, with no complicated manipulations, you can make the start menu, almost like Windows 7.
To return the tiles back, select the desired application in the list and right-click on it, select "Pin to Home Screen" in the drop-down menu. Thus, you can fill the live menu with your own applications and set their size - small, medium, wide, large.
ProComputeri.ru
How to set up Live Tiles in Windows 10
Greetings, dear friends and readers of my blog. Customizing the Start menu in Windows 10 is a very interesting, simple task. During this process, you can easily customize the functionality and appearance for yourself. But, as practice shows, a huge number of users simply do not know how to do it right. Therefore, based on my own experience and on the methods of changing the interface described on the Internet, I will write a step-by-step instruction for you on the topic: “Setting up tiles in Windows 10”.

METRO - new design style
I'll start the story with the fact that this graphical interface, which was released relatively recently, has replaced the Aero interface. This happened a few years ago, after the new Windows 8 OS and Microsoft mobile OS were officially introduced.
The Metro style is a great combination of modern design and a streamlined menu that consists of a series of rectangular blocks. In a very short time, this style has gained quite a lot of popularity among users of various mobile devices (such as tablets and smartphones). But users with personal computers and laptops reacted to this innovation very ambiguously. But if we take into account the pace of development of touch screens, then we can safely say that the popularity of the young Metro - interface will increase over time at times.
Operations on Start Menu Options
Changes in colors and sizes
In cases where the color of the tiles in the pop-up list of the Start menu is not to your liking, you can always change them. To do this, strictly adhere to the following points:
- Find the edge of the "Start" section, move the mouse cursor over it.
- Having directed the cursor to the desired location, hold down the left mouse button.
- Stretch or, on the contrary, reduce the borders with the help of movements (left, right, up, down):

- Hover over any area of the device's desktop.
- Click on it with the right mouse button, in the pop-up list, select "Personalization".
- In the left part of the window that opens, go to the new tab - "Colors".
- Decide on the most suitable color for you, click on the item "Show color in the Start menu":

Operations on changing the parameters of the left column
The entire left side contains three large sections: "Recently added", "Frequently used" and "All applications". The first tab houses all recently used programs, and thanks to the second tab, users get the fastest access to files, documents, and Windows Explorer. The All Applications tab contains a huge list of applications previously installed on the computer's operating system.

In order to change the parameters of the left column, you need to:
- Find the Taskbar and right-click on any empty space in it.
- In the pop-up list, find the item "Settings" and go to it.
- Go to the tab - "Start".
- Change the available options (choose a certain number of recent items to display in the jump list and adjust the privacy settings):

Activate Full Screen View
If you like the Windows 8 interface provided by Microsoft, you can make Windows 10 Start look like it. How to enable tiles in Windows 10?
- Just click once on the Taskbar (right mouse button).
- Then go to "Settings".
- Open a new tab named Start. In it, set the "Open in full screen" option to "Enabled".
- At the very end, just save your changes.
For the new block interface to appear, simply press the "Win" key. There is nothing complicated here, so the whole process should not cause you any difficulties and take a lot of time.
Add or remove an element
To create tiles in Windows 10, just follow a few simple steps.
- You need to go to the shortcut of the desired application. Right-click on it and select the "Pin to Start" tab from the list that appears:

- In order to remove the program, the actions are almost the same: right-click on the icon that was previously fixed and select "Unpin ..." in the list that appears:

Want to completely uninstall the app. Instruction - here >>>
Operations on dynamic tiles settings
Resizing and pinning
The new improved menu consists of a number of dynamic application blocks. As with older versions of Windows operating systems, you can change their positions by simply dragging and dropping. For example, to select their sizes, just right-click on one of the elements. In the list that appears, select the "Resize" item (small, medium, wide and large):

grouping
In Windows 10, you can easily group multiple apps together to make your Start screen more organized. To create a new group:
- Click on any tile with the left mouse button (hold down the key).
- Drag it down or up (your choice).
- After successfully creating the group, release the block.
- Give the newly created group a name (mouse over the top row of the group and type in a perfectly fitting name):

How to turn off live tile updates
I decided to dedicate this paragraph of the article to users who cannot cope with constant notifications from applications that are of little importance to them. As a rule, they prevent users from doing their work or distract them from other important matters. You can get around this problem like this:
- Call the context menu of the application (right-click on it).
- Select "Advanced" and then "Turn live tile off":

Now some intrusive applications will not bother you with annoying updates, and the general appearance of the rectangular block will remain standard.
At the end of the article, I have prepared very interesting and important points for you:
Return to Metro menu
How to get windows 10 tiles back?
Developers from Microsoft have provided the ability for users to manually activate the start screen. To replace the classic menu with the Metro, you need:
- On the taskbar, right-click once.
- In the menu that appears, select the Options tab.
- Select the "Start Menu" item.
- Uncheck the box next to "Use the Start menu instead of the Start screen" (use the standard menu instead of the start screen).
Confirm the changes and restart the system. After a successful restart of the computer, all changes will take effect.
In September 2016, an update was released that disabled the above feature. Therefore, the instruction may not work!
Return of the classic interface
How to remove Windows 10 start tiles?
One of the easiest ways to return to the old interface today is to remove all active components that display dynamic information. This is done very simply: all the necessary blocks are detached in turn from the Start menu. After only the tabs located directly on the left side of the window remain in the menu, change its width (note that its right side should be hidden).
On this I would like to conclude today's article. I really appreciate my readers, therefore, I will soon please you with a number of new and useful materials. Do not forget to subscribe to my blog updates and tell your friends about new articles on social networks. All the best to you and see you soon.
Sincerely, Victor!
it-technik.ru
How to Enable Tiled Start Screen in Windows 10
Windows 10 removed the tiled Start screen and brought back the Start menu instead. If you are used to menus with tiles, then you can turn on such a start screen. To do this, do everything as in the screenshots below.
Next, you will be logged out of your system. After the next computer boot, you will not see the Start menu, but the start screen with tiles in your Windows 10 operating system. By the way, you won’t be able to use both modes, so either tiles or standard mode.
Rate this post
it-territory.ru
is a new design language created and popularized by Microsoft with the release of Windows 8, first used on portable devices running Windows 7. Some of this interface style was seen in MSN 2.0 or Encarta 95, but it is not the same as today. It focuses more on effective typography by placing useful content in the center. Microsoft successfully used the famous international Swiss style. It was developed over 60 years ago and emphasizes readability, objectivity and ergonomics. It is easy to see that the point is to use a grid and fonts without sharp corners.
How to set up Live Tiles in Windows 10.
Microsoft first introduced the new design in Windows Media Center 2003 for Windows XP Media Center Edition. As a form of navigation, the focus here was on the content and the text used. In 2006, Zune updated the interface using slightly different principles, such as focusing more on content, beautiful typography, and less on UI design. From there, it moved to Windows 7 smartphones and then to the new Windows 8 operating system, released just after the end of the beta testing period. Other products, such as Windows Live Messenger, Live Mesh, and Outlook, also contain current user interface design trends.
The design inspires confidence and focuses attention on details. It creates a feeling of reliability and security. This new minimalist approach could be the true future of the internet. Portable devices such as tablets and touchscreen smartphones are the future of technology, and the modern user interface is designed specifically for such devices. Yes, Windows 8 for computers and phones has the same interface, but who knows how long we'll be using a mouse and keyboard.

Setting up a tiled interface in Start
Microsoft loves tiles and wants you to love them too. They appeared in Windows 8 and later Windows 10, even with the return of the Start Menu. Whether you love tiles or not, you can customize them to make it easier for you to access your favorite apps. How to set them up? You can resize them, bring them to the Start menu, turn Live Slices on and off, and organize them into specific groups. Let's consider the interface settings in more detail.
Let's see how to add tiles. To create extra space for more tiles, click the Start button - Settings - Personalization - Start. On the right, find and activate the "Show more tiles in the Start menu" function. Now press start and you will see that the menu area has become larger, creating more space for new tiles. Next, right-click on any application and click "Pin to Start Screen".

Size setting
As with Windows 8 and 8.1, you can also resize pinned tiles in Windows 10 to make them larger or smaller. To do this, right-click on the tile, then hover over the Resize option from the pop-up menu and select a new one from the 4 available sizes.
grouping
You can place tiles in different groups to keep them organized and easier to find. For example, you can create one group for your main applications, another group for web-related applications, and a third group for games. First select the tile you want to use to create a new group and move it to an empty area on the start menu. Then move all other application shortcuts to this group. Continue until you have entered all applications. Now we need to give the group a name. Hover your mouse just above the first tile in the group until "Name Group" appears. Click on it with the mouse, enter the name of the new group and press Enter.

With the release of Windows 10 Creators Update, you can use a new feature that allows you to place shortcuts in folders. This process will help you better organize your tiles so they take up less screen space. Let's say you want to put all your entertainment related apps in one folder. For example, Xbox, Groove Music, Movies & TV and Netflix. Start by dragging one tile on top of another, such as placing a Groove Music tile on top of an Xbox tile.
Your Xbox and Groove Music shortcuts are now in the same folder. To access one of the applications, simply click on the folder to open and display its shortcuts. Then select the application you want to launch. If you need to add another tile to the folder, just drag it. Continue this process until you have dragged all related applications. Then the folder can be renamed.
Prevent tiles from updating
Live Tiles can be very handy as they show you the latest news and other updated information. To disable their animation, right-click a live tile, such as News, Weather, or Calendar. In the pop-up menu, hover your mouse over the Advanced option and click Disable Live Tiles. Animation will be disabled.

Customize the colors of the Start menu
To customize the color scheme, click Start and select Settings. In the "Personalization" section on the left, select "Colors". A menu will open with a choice of background colors for the tiles. The "Automatic selection of the main background color" function will automatically select a shade suitable for the color scheme of the wallpaper.

Additional design options are also available here. The Transparency Effects Toggle makes the taskbar and start menu background slightly transparent. The selected color can also be automatically duplicated in other interface elements - on the taskbar, in the notification center and in window titles. If you disable this feature, the background of the Start menu, the taskbar, and the titles of active windows will turn dark gray.
Return to Metro menu
Owners of gadgets and PCs running Windows 8 are already accustomed to the full-screen design in the style of Metro. Start in Windows 10 combines old and new design elements. How to disable tiles in Windows 10? To switch to the familiar full screen display, click Start and select Settings. In the "Personalization" section, go to the "Start" section, find here the option "Open the Start menu in full screen mode" and enable it. After that, when you open the Start menu, you will see the standard Metro design taking up the entire desktop screen.

How to Remove Tiles from the Start Menu in Windows 10
Removing tiles can take some time, as you will have to do this for each label separately. Select any tile with the right mouse button and click "Unpin from Start". After that, the tile will disappear, but the program in the Start list will still remain. How to remove live tiles? To make Start look as similar as possible to the design of Windows 7, you need to remove all the tiles and manually resize the panel. After removing the shortcuts, “grab” the right side of the Start menu with the mouse and drag it as far as possible to the left.
Return of the classic interface
The method described above will not return a full-fledged menu from the seven, but only make it a little similar. To get a full-fledged familiar list of programs without cluttering the desktop, you will have to use third-party software. Classic Shell is the perfect solution for people who are concerned about the new features of Windows 8, 8.1 and 10. The program is a powerful tool that contains many options for reverting to the old, good solutions known from earlier versions of the Microsoft system. The program allows you to restore:
- classic start menu
- classic look of Internet Explorer 9;
- classic Windows Explorer look.
With the help of extensive settings, you can choose the look of the Start menu (Windows Classic, Windows XP, Windows 7), change settings, general behavior, menu appearance, or search actions. In addition, you can edit sounds, context menus, the appearance of the Start button, etc. Classic Shell also allows you to back up your saved settings.

Similarly, you can change the appearance settings of Internet Explorer or Windows Explorer. You can even add the classic toolbar to Windows Explorer. In addition, skins created by other users are available, and even an editor of your own. The number of options that Classic Shell offers is constantly increasing, and, most importantly, the program is available absolutely free of charge. The software has a huge number of additional options, thanks to which the appearance of individual elements in Windows 8 and 10 is configured. The application is no longer updated. The manufacturer launched a new project - Classic Start.
Classic Start is a new utility that allows you to return the "Start" to its previous appearance. The software is based on the popular Classic Shell application. Thus, the developer continues his old project, offering new features and additional functionality.

StartIsBack++ is a small extension that restores the Start Menu in Windows 10. The application restores the Start Menu along with all features and tools, keeping the same look and feel as in previous Windows 7/8 systems. StartIsBack improves the functionality of the desktop and the use of the most important tools. The application starts automatically with the operating system. It restores the original Start menu with all the most important functions - search, pinning the most used applications to the left window, as well as options with which we can turn off, restart or put the computer into standby mode.

StartIsBack restores a list of recently opened documents, a catalog of games, music and images, and a functional control panel. It is also worth mentioning the menu with the installed printer and other connected external devices.
Hello everyone, today I will tell you how you can edit start menu in windows 10 with their tiles, or rather create tiles, so to speak, to show off in front of comrades. Consider the most popular programs that will help us accomplish this task, among them, there are both paid and free ones, in any case, you need to be able to perform a small tuning of the operating system, which does not take much effort.
And so, let me remind you that the tiles themselves still appeared with the release of Windows 8.1, along with the metro interface. Each tile is either a shortcut to an app from your computer or a shortcut to an app from the store. When you install a new app from the store, the tiles are automatically added to your Start.
Earlier I told you how to add tiles to the windows 10 start, I showed you the methods for splitting and sorting them, I advise you to read.
I want to note that in order to solve the problem of creating our own tiles in the Windows 10 Start menu, we will use third-party free utilities.
What do these tiles look like in Windows 10. Below I posted a screenshot so that newcomers do not have misunderstandings.

Creating tiles with Tile Iconifier
Let's first look at the Tile Iconifier utility, it is completely free, has a Russian interface, which is not unimportant, and can make its own home screen tiles.

After unpacking the archive, you will see that the program is portable, that is, it does not require installation. Let's launch it. The program will show you in the Shortcut Name window all the shortcuts that it could find in your operating system. Below will be shown the path to the shortcut of your programs and the path to the executable file.

To change the image on the label, select the desired one and double-click on the black icon. At the same time, for the tile image, you can specify not only files from icon libraries, but also your own images in PNG, BMP, JPG. And for PNG, transparency is supported and works.
Set the switch to Use custom image and click the Browse button to select an image.

As you can see, I now have the selected image displayed in the Medium icon field, to apply it, click Tile Iconify!.

You can also edit it a little here, for example, by selecting Background Color, I set it to silver as an example.

Now, in order to see the new tile with the new design, you need to pin it to the home screen.
If you think that Tile Iconifier can change pictures on existing labels, then you are mistaken. At the top, click the menu Utilities > Custom Shortcut Manager.

In the window that opens, you can create a new shortcut, which you then place in the tiles.

Click Create New Shortcut. A wizard will open where you will have to go through a couple of steps.
- Explorer - to create shortcuts to simple and special Explorer folders, including control panel items, devices, various settings.

- Steam - for creating shortcuts and tiles for Steam games.
- Chrome Apps - shortcuts and tile designs for Google Chrome apps.
- Windows Store - for Windows Store apps
- Other - manual creation of any shortcut and its launch with parameters.
I will create a shortcut to the folder

Below, in the Shortcut Name field, set the required display name and you can immediately set the icon for the shortcut on the left. All we press Generate Shortcut, for its creation.

After that, the newly created shortcut will appear in the All Apps - TileIconify section (from where it can be pinned to the home screen), as well as in the list in the main Tile Iconifier window, where you can customize the tile for this shortcut - an image for medium and small tiles, a caption , background color (same as it was described at the beginning of the program review).

Add a folder or document to the home screen
You can add a folder or document to the Start screen without additional software. to do this, open the explorer along this path
C:\ProgramData\Microsoft\Windows\Start Menu\Programs

Drag any document or shortcut to it here, after which it will appear in the Start menu > All applications, right-click on it > Pin to Start Screen.
Create tiles with Windows 10 Pin More
You can download the Pin More application from the Windows Store, unfortunately it is paid, but there is a trial version for 3 days. It allows you to create up to 4 tiles in the free version.
Open the Windows 10 Store.

Enter Pin More in the search box

Choose Try it for free to evaluate the features of the application.

The installation of Pin More will begin.

We launch the application. In the main window, you'll be able to choose what you need the Home screen tile for:
- For net, Steam, Uplay, and Origin > games, the generated game tiles are "live" and display game information from the specified services.
- For documents and folders.
- for steam
- For sites - and it is also possible to create live tiles that receive information from the site's RSS feed.

For example, I chose Web, I will create a tile that will open my site in the browser. Below, add a picture.

A little to the right, you can set a large logo and background color.

To complete the creation, in the left corner on a blue background, click the button icon. We confirm that we want to pin this tile to the Start menu.

As you can see, everything is perfectly created and the new tile deservedly flaunts in its place.

Creating tiles with Win10Tile
Another of the free utilities for creating your own tiles in Windows 10 is Win10Tile. It does exactly the same thing as other programs. Of course, there are limitations, in particular, you cannot create new shortcuts from it, but you can arrange tiles for existing ones in the All applications section.
By launching Win10Tile you will see the full list of shortcuts, which is available in the All Applications section


Popular
- Why PC-Radio does not work: the main reasons and their solution Pc radio why there is no sound
- Mind map software iMindMap Mind map software
- Windows System Restore Set up automatic creation of restore points
- Why PC-Radio does not work: the main reasons and their solution
- Programs for creating mind maps
- Mind Mapping Software iMindMap Best Mind Mapping Software
- Web design for beginners
- Yandex disk for collaboration
- How to secure your computer
- Web design lessons from scratch